
Sunday, December 5, 2010

Pictures of all recipes posted so far


' Recipe featured in 'The Hindu'


I am much delighted to share the happy news with you that I got featured in mygrandma'sRECIPES, a column in The Hindu meant for foodies, featuring traditional recipes learnt from the grandmothers!

I had known about this column in Chennai edition of The Hindu and was looking forward to the same in my town too!
Soon, I came to know about this column being started in my town too, which didn't hold me back!

This post is dedicated to my wonderful friends and relatives of my town!

Popular Recipes ~ Click on the picture to get the recipe.


Pin It!

Thursday, November 4, 2010


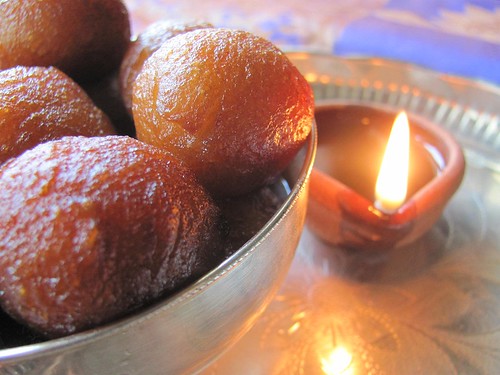
Wishing you all a very Happy & Prosperous Diwali !

May the blessings of Peace, Prosperity and Happiness be with you on Diwali and always!


Click here if you're eager to know how I made these cuties ;)
Pin It!

Tuesday, October 26, 2010

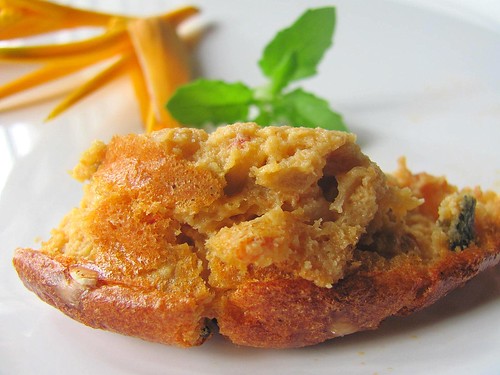
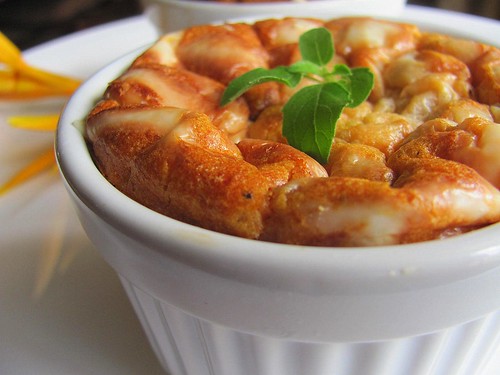
tomato souffle


We are really excited to have 3 choices for the month. Chocolate mousse (with egg and eggless versions) and Tomato Souffle. I chose to carry on with Tomato Souffle as towards the savoury side and wanted take a break with baking chocolates for a while.


Recipe Source- Australian Women's Weekly via Marias menu

1. Bread Crumbs- 1/2 cup firmly packed

2. Butter- 45 gms (refer healthier version)
Onion- 1 medium, finely chopped
Plain flour(maida)-2 tbsp
Milk- 1 cup

3. Tomato paste- 3 tbsp
Basil- 1 tbsp, finely chopped (optional)

4. Eggs- 3, separated

5. Grated cheese- a handful ( I used cheddar)

Grease 4 souffle dishes (1/2 cup capacity), sprinkle with bread crumbs. Melt butter in small saucepan, add finely chopped onion. Stir over low heat for 2 mins (or MW on HIGH for about 2 mins).Cook until onion is soft, it doesn't have to becosme brown. Stir in flour and stir over medium heat for a minute (or MW on HIGH for a min). Remove from heat. gradually stir in milk, return to heat, stir over high heat until mixture boils and thickens and reaches a thick sauce like consistency (or MW on HIGH for about 3 mins).

Transfer to large bowl, stir in tomato paste and basil Leaves. Cover the dish and let it stand for 5 mins. Beat egg whites in a small bowl until soft peaks form. Add egg yolks to the onion and milk mixture and mix well. Fold the egg whites into the mixture in 2 batches. Pour the mixture evenly into the prepared dishes. Sprinkle the grated cheese on top. Bhake in the preheated oven for 20-25 mins or until lightly browned.


Healthier version: use brown bread crumbs and low fat milk. Also use yolks of only 2 eggs and white of 3 eggs. Use only lesser qty of butter.

Notes: The above qty serves 2 adults served with garlic bread or soup. You can use any oven safe dish to prepare this. The original recipe calls for no spices, but you can add crushed pepper while cooking onion, if you wish.

Substitute for tomato paste: http://chowhound.chow.com/topics/312148


Pin It!

Monday, October 25, 2010


We are really excited to have 3 choices for the month. Chocolate mousse (with egg and eggless versions) and Tomato Souffle. I chose to carry on with Tomato Souffle as towards the savoury side and wanted take a break with baking chocolates for a while.


Recipe Source- Australian Women's Weekly via Marias menu

1. Bread Crumbs- 1/2 cup firmly packed

2. Butter- 45 gms (refer healthier version)
Onion- 1 medium, finely chopped
Plain flour(maida)-2 tbsp
Milk- 1 cup

3. Tomato paste- 3 tbsp
Basil- 1 tbsp, finely chopped (optional)

4. Eggs- 3, separated

5. Grated cheese- a handful ( I used cheddar)

Grease 4 souffle dishes (1/2 cup capacity), sprinkle with bread crumbs. Melt butter in small saucepan, add finely chopped onion. Stir over low heat for 2 mins (or MW on HIGH for about 2 mins).Cook until onion is soft, it doesn't have to becosme brown. Stir in flour and stir over medium heat for a minute (or MW on HIGH for a min). Remove from heat. gradually stir in milk, return to heat, stir over high heat until mixture boils and thickens and reaches a thick sauce like consistency (or MW on HIGH for about 3 mins).

Transfer to large bowl, stir in tomato paste and basil Leaves. Cover the dish and let it stand for 5 mins. Beat egg whites in a small bowl until soft peaks form. Add egg yolks to the onion and milk mixture and mix well. Fold the egg whites into the mixture in 2 batches. Pour the mixture evenly into the prepared dishes. Sprinkle the grated cheese on top. Bhake in the preheated oven for 20-25 mins or until lightly browned.

Healthier version: use brown bread crumbs and low fat milk. Also use yolks of only 2 eggs and white of 3 eggs. Use only lesser qty of butter.

Notes: The above qty serves 2 adults served with garlic bread or soup. You can use any oven safe dish to prepare this. The original recipe calls for no spices, but you can add crushed pepper while cooking onion, if you wish.

Substitute for tomato paste: http://chowhound.chow.com/topics/312148

Pin It!

Sunday, October 3, 2010

recipe index for swapna

Swapna's Specials


The Menu!


Back to Swapna's Cuisine!


WINES


Ginger wine
Ginger Wine
Date wine
Date Wine
Carrot Whiskey
Carrot Whiskey
Pin It!

Friday, October 1, 2010


I happened to read somewhere that chocolate lava cake was the result of a major culinary disaster; the dessert meant to be individual chocolate cakes which didn't get cooked well resulting in a soft runny chocolatey centre. The resulting "uncooked centred" cake was duly favourited by the baker as well his guests!

Obviously being in my should-try-once list I was excited when Divya announced the recipe for October's sweet punch! The very Molten Chocolate Lava Cake!

So here we have to be careful not to cook the cake 'a little too much' thereby resulting in a 'well cooked centred' chocolate cake ;)

Preparing the batter was a breeze.For the very first time I enjoyed melting chocolates in my double boiler milk cooker, the baking bars brought down by my sister.
As mentioned earlier I wanted to cook them carefully to get used to the baking time and chose to bake them one by one. The first ramekin got cooked a little too much with 19 minutes, while the second one was too mushy with 15 minutes.Now I knew the time and controlled the time as 17 minutes. Remember, the baking time according to your oven model and setting.


Only when I placed the cake on the plate did I realise that the uncooked centre was sticking at the bottom, resulting in a 'not so smooth finished top part'. Besides all the cakes failed to hold its shape :( letting down my expectations of having that firm dark cake with the lava flowing out, beuatifully!
When the 5th ramekin hopped out hot from the oven, I couldn't wait any longer.....
..scroll down to the last picture, please ;)


Molten Lava Cake (yielded 5 ramekins for me)
Recipe source - showmethecurry.com

Ingredients:

Semi-Sweet Baking Chocolate – 4 oz (113g)
Butter – 4 oz (113g)
Eggs – 2
Sugar – 1/3 cup (75 g)
All-purpose Flour – 1/4 cup (40g)
Butter – for greasing ramekins

Method:

Method:

1. In a double boiler, melt chocolate.
2. In a medium mixing bowl, beat Eggs and Sugar until light and fluffy.
3. Once chocolate is melted, remove pan from heat and add in butter. Mix until the butter melts fully.
4. Add chocolate/butter mixture into the eggs, add all-purpose flour and mix until well incorporated.
5. Butter bottom and sides of ramekins (small glass/porcelain bowls) and pour in mixture about 3/4 way full.
6. Place ramekins on a baking tray and bake at 350 degrees Fahrenheit (180 C) for 10 – 15 minutes. Shorter for gooey (molten) inside, longer for stiff inside.
7. Serve hot with vanilla ice cream.


The little 'over baked' lava cake on the farther end! The rest of them waiting to get in the oven!
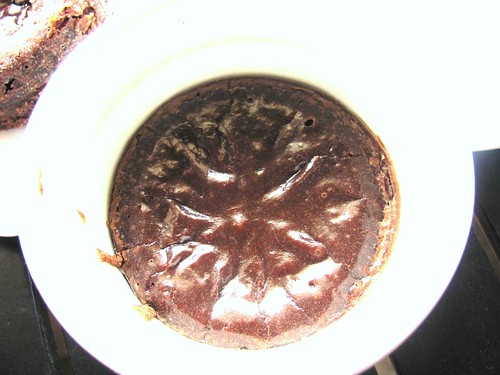

A bit over exposed, but just to have a peep into the ramekin at that 'rightly baked' molten lava cake..
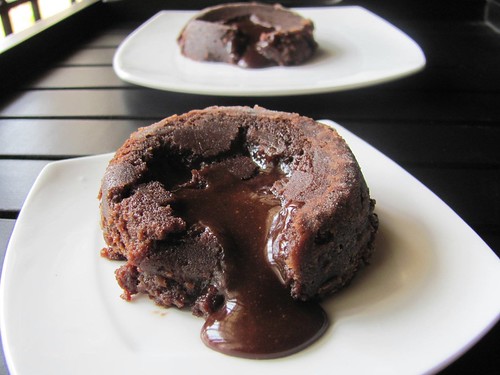

..confirmed by digging in a spoon and licking it clean ;)
Warning: Extremely Hot Product- No burning tongues please ;)


P.S - Some people find it gross to have cakes with uncooked centers[not me to Divya :)!!] and feel the lava is nothing but uncooked batter.I have a solution for that too--if you feel so too,just place a chocolate chunk in between--pour half the batter into the ramekin and place a chocolate chunk,and pour the remaining batter and cook for a longer time than mentioned.You could also place cold ganache in between,choices are numerous!!


Pin It!

Sunday, September 5, 2010


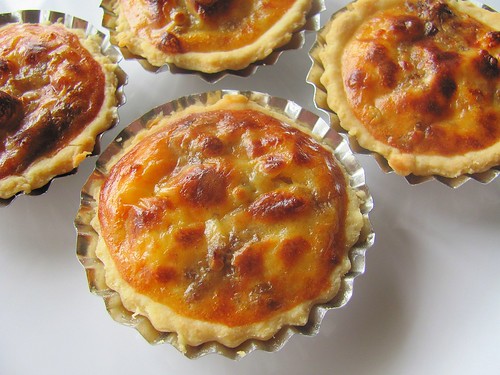
After the daring sweet punches I'd really been waiting for a savoury one and here's Ria with a simple and fool proof recipe of quiche! The easy availability of ingredients tempted me to lay the hands on them without much delay.


Since I do not own a pie/quiche pan I baked them in my cute little tart pans! :)

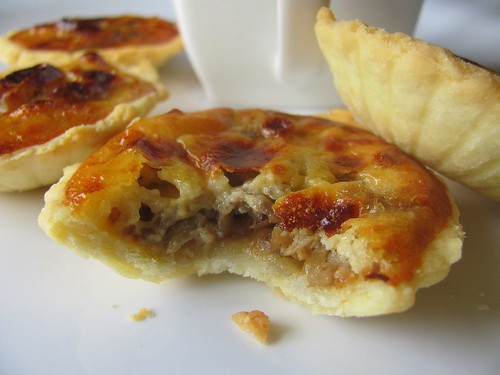
Well, these cuties are definitely not a good choice for weight watchers like me and I was contented to see my son devouring them, heartily :)
I made another batch for my daughter and her friends who turned up for the weekend who loved them, absolutely!

Golden Onion Quiche

Serves-4

Ingredients:

For the pastry:

Maida - 200 g
Butter ( frozen)-100 g (preferably unsalted)
Baking powder- 1/4 tsp
Salt- to taste
Beaten egg-1
Ice cold water- as required (which will be a few drops)

  • Sieve maida, salt and baking powder together. Grate in the butter and mix with the flour with your fingertips till it resembles coarse sand.
  • Add in the beaten egg and water and gather it onto a soft dough.
  • Roll it out on a lightly floured surface and lift it up carefully. Line the tin that you will be baking it in. If it breaks up you need to do a patch work, big deal! It wouldn't be seen outside! ;)
  • Which ever tin you are using, make sure the dough comes a little way up the sides, so that it can hold the filling in.


Filling:

Boiled and shredded chicken- 1/2 cup( you can substitute paneer or other veggies of your choice)- I used 250 gms of finely cut button mushrooms.
Onions- 250 g chopped (I used 4 large, chopped fine)
Milk-1 cup( I used 1/2 cup)
Cheese- 100 g (cheddar works fine)
Beaten eggs-3 (I used only one)
Salt and pepper to taste
Oil- as needed

  • Heat oil and slightly fry the mushrooms. After the water has oozed out add in the onions and fry till caramelised.
  • Switch off the flame.
  • Add milk, cheese, beaten eggs, salt and pepper and mix well.
  • Pour into the pastry case and bake for 25 mins or till golden brown.
  • Let it cool in the tin completely. Serve it in wedges (I served them as such as mini quiches).


My Notes

  • I was happy to have I baked perfect mini quiches, 25 in all following the recipe for the first time. The baking time was 15 minutes with temperature set to 200 deg c.
  • The base-I avoided chilled water as the pastry dough was moist after kneading with the butter.I am still not sure whether the base requires a pre baking part as the top of the filling was a bit over browned, while the shells remained 'just cooked'.
  • The filling-Since my husband and son dislike eggs I used only one instead of three in the original recipe for the filling.
  • Again, I made the egg-milk-cheese mixture separately and poured it over the crust which was layered with the onion- mushroom mixture first (and used only 1/2 cup milk instead of 1) like my sis did :)


Pin It!

Friday, August 27, 2010


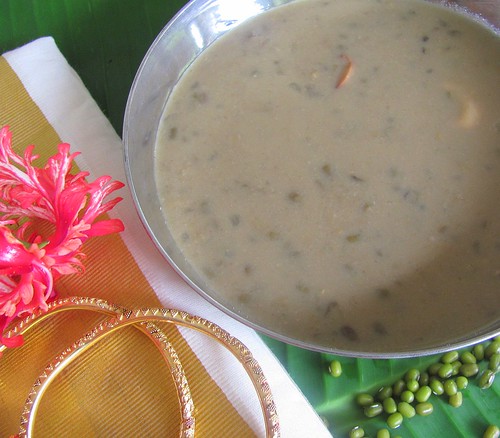
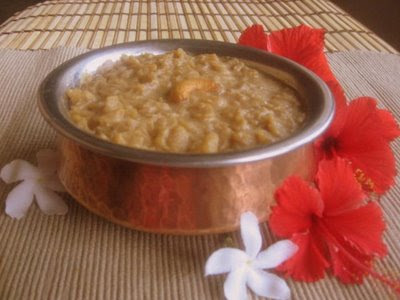
Cherupayar (Whole Green Gram) Payasam.

It was a rainy Sunday morning while my aunt came to visit us with a container of this hot payasam.
I was in Kottayam nursing mom, then.The Payasam that was served immediately in large bowls, tasted heaven; the cooked cherupayar melting in mouth with flavourful coconut milk and sweetness of jaggery with that distinct aroma of Kerala cuisine, the bits of coconut pieces to compliment...

I finished my bowl of payasam, hurried out for a bowl I could grab from the kitchen, flowers from the garden, saree from mom's wardrobe, bronze pan, camera and I was all set. :)..Click..Click...

So what next? write down the recipe!! ;)

I found my aunt already in her level 2 conversation( progression to a serious mode from the lighter level1 form;)) with my parents but couldn't help pestering her for the recipe.. ;)..after all a dad's sis can always be taken for granted, right? ;)

I know I am a little late to post this delicacy, which I meant to post for Onam.
They say; better late than never!

so here's it..

Get ready with:

Whole Green Gram(Cheru payar)- 1 cup
Jaggery- 250 gm

Coconut milk- 4 cups
Cashew nuts, broken into halves and fried in ghee- a few
Coconut sliced into small pieces, fried in ghee -1 tsp

Cardamom powder- to flavour

How to make it:


Fry the whole green gram in a hot pan. Cook the gram in 4 cups (more or less)of boiling water. In the meanwhile, boil and melt jaggery in 1/4 cup of water in a sauce pan. Cool and strain so as to remove the impurities. Keep aside.
When the gram has cooked soft add the above jaggery syrup. Simmer the mixture until it turns thicker stirring all the while taking care not to burn the bottom. Remove from fire and mix in the coconut milk. Add the coconut pieces and cashew nuts. Bring it to a slow boil and turn off immediately not to let it simmer.

Serve warm Cherupayar Payasam with Onasadya.

The Payasam tastes heaven while chilled too (well, I love it this way :))
Pin It!