Sunday, June 6, 2010

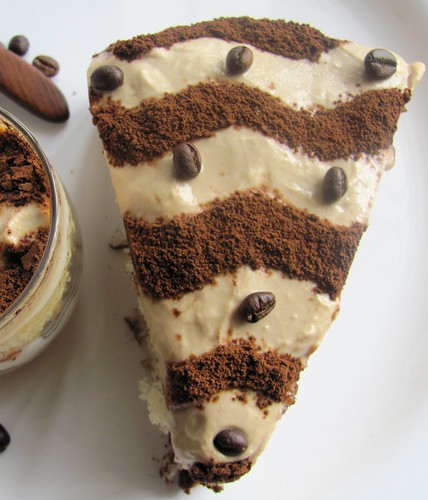
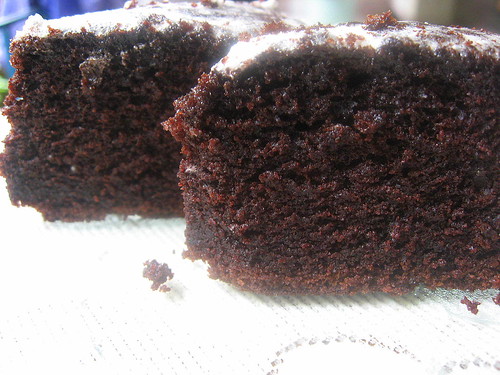
The Rich Mocha and Creamy flavoured soft moist cake pieces with a hint of liquor that adds a classic touch to the taste and this is when you have an Explosion of chocolate on your tongue!

You Either 'Love' Tiramisu or 'Hate' it!

Obviously I fell in Love with this comforting traditional dessert served with style, in all its 'glamour', a decade ago, while fine dining with my man in one of the elite French restaurants at Champs-Elysees.

I never had in my distant most dreams that I would ever try baking this heavenly dessert , as I am for sure- never a Daring Baker!

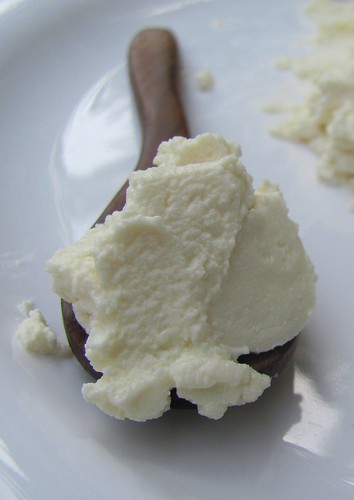
It took a while to overcome my fears of making mascarpone from fresh cream, as we don’t get the cheese as such in the vicinity of around 350 kms!

and finally I succeeded in making 6 0z of Mascarpone from Amul Fresh Cream!

About, A Sweet Punch

Well, they have a passion - it's baking!
they have a mission - its making baking simpler for everyone.

So they (Divya, Ria and Maria) will be trying a variety of baked goodies one for each month of the year!

All I needed next was a gentle push when it comes to venturing new recipes esp when it comes to baking and thus I got into ‘Sweet Punch’, when Ria had sent over the step by step recipe of the Classic Tiramisu!

Tiramisu Cake

Baking: From My Home to Yours by Dorie Greenspan

For the cake layers:

2 cups cake flour

2 teaspoons baking powder

1/8 teaspoon baking soda

1/4 teaspoon salt

1 1/4 sticks (10 tablespoons) unsalted butter, room temperature

1 cup sugar

3 large eggs

1 large egg yolk

1 1/2 teaspoons pure vanilla extract

3/4 cup buttermilk

For the espresso extract:

2 tablespoons instant espresso powder

2 tablespoons boiling water

For the espresso syrup:

1/2 cup water

1/3 cup sugar

1 tablespoon amaretto, Kahlua, or brandy

For the filling and frosting:

1 8-ounce container mascarpone (store-bought or homemade)

1/2 cup confectioners’ sugar, sifted

1 1/2 teaspoons pure vanilla extract

1 tablespoon amaretto, Kahlua, or brandy

1 cup cold heavy cream

2 1/2 ounces bittersweet or semisweet chocolate, finely chopped, or about 1/2 cup store-bought mini chocolate chips

Chocolate-covered espresso beans, for decoration (optional)

Cocoa powder, for dusting

Getting ready:

Center a rack in the oven and preheat the oven to 350 degrees F. Butter two 9×2 inch round cake pans, dust the insides with flour, tap out the excess, and line the bottoms of the pans with parchment or wax paper. Put the pans on a baking sheet.

To make the cake:

  • Sift together the cake flour, baking powder, baking soda, and salt.
  • Working with a stand mixer, preferably fitted with a paddle attachment, or with a hand mixer in a large bowl, beat the butter on medium speed until soft and creamy.
  • Add the sugar and beat for another 3 minutes. Add the eggs one by one, and then the yolk, beating for 1 minute after each addition. Beat in the vanilla; don’t be concerned if the mixture looks curdled. Reduce the mixer speed to low and add the dry ingredients alternately with the buttermilk, adding the dry ingredients in 3 additions and the milk in 2 (begin and end with the dry ingredients); scrape down the sides of the bowl as needed and mix only until the ingredients disappear into the batter. Divide the batter evenly between the two pans and smooth the tops with a rubber spatula.
  • Bake for 28 to 30 minutes, rotating the pans at the midway point. When fully baked, the cakes will be golden and springy to the touch and a thin knife inserted into the centers will come out clean. Transfer the cakes to a rack and cool for about 5 minutes, then run a knife around the sides of the cakes, unmould them, and peel off the paper liners. Invert and cool to room temperature right-side up.

To make the extract:

  • Stir the espresso powder and boiling water together in a small cup until blended. Set aside.
  • To make the syrup:
  • Stir the water and sugar together in a small saucepan and bring just to a boil. Pour the syrup into a small heatproof bowl and stir in 1 tablespoon of the espresso extract and the liqueur or brandy; set aside.

To make the filling and frosting:

Put the mascarpone, sugar, vanilla, and liqueur in a large bowl and whisk just until blended and smooth.

Working with the stand mixer with the whisk attachment or with a hand mixer, whip the heavy cream until it holds firm peaks. Switch to a rubber spatula and stir about one quarter of the whipped cream into the mascarpone. Fold in the rest of the whipped cream with a light touch.

To assemble the cake:

If the tops of the cake layers have crowned, use a long serrated knife and a gentle sawing motion to even them. Place one layer right-side up on a cardboard round or a cake plate protected with strips of wax or parchment paper. Using a pastry brush or a small spoon, soak the layer with about one third of the espresso syrup. Smooth some of the mascarpone cream over the layer – user about 1 1/4 cups – and gently press the chopped chocolate into the filling. Put the second cake layer on the counter and soak the top of it with half the remaining espresso syrup, then turn the layer over and position it, soaked side down, over the filling. Soak the top of the cake with the remaining syrup.

For the frosting, whisk 1 to 1 1/2 tablespoons of the remaining espresso extract into the remaining mascarpone filling. Taste the frosting as you go to decide how much extract you want to add. If the frosting looks as if it might be a little too soft to spread over the cake, press a piece of plastic wrap against its surface and refrigerate it for 15 minutes or so. Refrigerate the cake too.

With a long metal icing spatula, smooth the frosting around the sides of the cake and over the top. If you want to decorate the cake with chocolate-covered espresso beans, press them into the filling, making concentric circles of beans or just putting some beans in the center of the cake.

Refrigerate the cake for at least 3 hours (or for up to 1 day) before serving – the elements need time to meld.

Just before serving, dust the top of the cake with cocoa.

After notes

How “Punching” was it ?

To make Tiramisu from scratch demanded 2 days plus a day of refrigeration and thus a total of 3 whole days were required. So calculate the time you need to start with time you intend to serve the dessert.

The sponge cake came out perfectly!.soft, spongy, moist, melt in the mouth,which I’d baked on Day-1, around noon. At night, I’d made Mascarpone.

Day-2 was planned for cutting and layering the cake to turn it magically into Tiramisu.

When I was layering the cheese, the room temperature was 40 deg C.Yes, the peak summer day of T.N. I had much difficulty working with it as it was turning to be a watery creamy something.Pushing the whole thing into the freezer once in every 2 minutes helped a little, but then we had a power shut down of full 4 hours at a stretch!.Soon I found myself filling and frosting the cake with my head squeezing into the freezer compartment wide open ;)..

Whew!! it was tiring, absolutely, as the grated chocolate, supposed to be layered over the cheese, was melting fast turning out to be a lump of soft something, again,giving me a shock..

I was forced to use sprinkled chocolate powder as the nearest alternative. Using chocolate chips was a last option, as we don’t like biting into them in soft desserts.

I substituted home made grape wine for the alcohol part.

I am immensely contented with the final outcome, the Perfect Tiramisu a beginner can make!

Pin It!

The Rich Mocha and Creamy flavoured soft moist cake pieces with a hint of liquor that adds a classic touch to the taste and this is when you have an Explosion of chocolate on your tongue!

You Either 'Love' Tiramisu or 'Hate' it!

Obviously I fell in Love with this comforting traditional dessert served with style, in all its 'glamour', a decade ago, while fine dining with my man in one of the elite French restaurants at Champs-Elysees.

I never had in my distant most dreams that I would ever try baking this heavenly dessert , as I am for sure- never a Daring Baker!

It took a while to overcome my fears of making mascarpone from fresh cream, as we don’t get the cheese as such in the vicinity of around 350 kms!

and finally I succeeded in making 6 0z of Mascarpone from Amul Fresh Cream!

About, A Sweet Punch

Well, they have a passion - it's baking!
they have a mission - its making baking simpler for everyone.

So they (Divya, Ria and Maria) will be trying a variety of baked goodies one for each month of the year!

All I needed next was a gentle push when it comes to venturing new recipes esp when it comes to baking and thus I got into ‘Sweet Punch’, when Ria had sent over the step by step recipe of the Classic Tiramisu!

Tiramisu Cake

Baking: From My Home to Yours by Dorie Greenspan

For the cake layers:

2 cups cake flour

2 teaspoons baking powder

1/8 teaspoon baking soda

1/4 teaspoon salt

1 1/4 sticks (10 tablespoons) unsalted butter, room temperature

1 cup sugar

3 large eggs

1 large egg yolk

1 1/2 teaspoons pure vanilla extract

3/4 cup buttermilk

For the espresso extract:

2 tablespoons instant espresso powder

2 tablespoons boiling water

For the espresso syrup:

1/2 cup water

1/3 cup sugar

1 tablespoon amaretto, Kahlua, or brandy

For the filling and frosting:

1 8-ounce container mascarpone (store-bought or homemade)

1/2 cup confectioners’ sugar, sifted

1 1/2 teaspoons pure vanilla extract

1 tablespoon amaretto, Kahlua, or brandy

1 cup cold heavy cream

2 1/2 ounces bittersweet or semisweet chocolate, finely chopped, or about 1/2 cup store-bought mini chocolate chips

Chocolate-covered espresso beans, for decoration (optional)

Cocoa powder, for dusting

Getting ready:

Center a rack in the oven and preheat the oven to 350 degrees F. Butter two 9×2 inch round cake pans, dust the insides with flour, tap out the excess, and line the bottoms of the pans with parchment or wax paper. Put the pans on a baking sheet.

To make the cake:

  • Sift together the cake flour, baking powder, baking soda, and salt.
  • Working with a stand mixer, preferably fitted with a paddle attachment, or with a hand mixer in a large bowl, beat the butter on medium speed until soft and creamy.
  • Add the sugar and beat for another 3 minutes. Add the eggs one by one, and then the yolk, beating for 1 minute after each addition. Beat in the vanilla; don’t be concerned if the mixture looks curdled. Reduce the mixer speed to low and add the dry ingredients alternately with the buttermilk, adding the dry ingredients in 3 additions and the milk in 2 (begin and end with the dry ingredients); scrape down the sides of the bowl as needed and mix only until the ingredients disappear into the batter. Divide the batter evenly between the two pans and smooth the tops with a rubber spatula.
  • Bake for 28 to 30 minutes, rotating the pans at the midway point. When fully baked, the cakes will be golden and springy to the touch and a thin knife inserted into the centers will come out clean. Transfer the cakes to a rack and cool for about 5 minutes, then run a knife around the sides of the cakes, unmould them, and peel off the paper liners. Invert and cool to room temperature right-side up.

To make the extract:

  • Stir the espresso powder and boiling water together in a small cup until blended. Set aside.
  • To make the syrup:
  • Stir the water and sugar together in a small saucepan and bring just to a boil. Pour the syrup into a small heatproof bowl and stir in 1 tablespoon of the espresso extract and the liqueur or brandy; set aside.

To make the filling and frosting:

Put the mascarpone, sugar, vanilla, and liqueur in a large bowl and whisk just until blended and smooth.

Working with the stand mixer with the whisk attachment or with a hand mixer, whip the heavy cream until it holds firm peaks. Switch to a rubber spatula and stir about one quarter of the whipped cream into the mascarpone. Fold in the rest of the whipped cream with a light touch.

To assemble the cake:

If the tops of the cake layers have crowned, use a long serrated knife and a gentle sawing motion to even them. Place one layer right-side up on a cardboard round or a cake plate protected with strips of wax or parchment paper. Using a pastry brush or a small spoon, soak the layer with about one third of the espresso syrup. Smooth some of the mascarpone cream over the layer – user about 1 1/4 cups – and gently press the chopped chocolate into the filling. Put the second cake layer on the counter and soak the top of it with half the remaining espresso syrup, then turn the layer over and position it, soaked side down, over the filling. Soak the top of the cake with the remaining syrup.

For the frosting, whisk 1 to 1 1/2 tablespoons of the remaining espresso extract into the remaining mascarpone filling. Taste the frosting as you go to decide how much extract you want to add. If the frosting looks as if it might be a little too soft to spread over the cake, press a piece of plastic wrap against its surface and refrigerate it for 15 minutes or so. Refrigerate the cake too.

With a long metal icing spatula, smooth the frosting around the sides of the cake and over the top. If you want to decorate the cake with chocolate-covered espresso beans, press them into the filling, making concentric circles of beans or just putting some beans in the center of the cake.

Refrigerate the cake for at least 3 hours (or for up to 1 day) before serving – the elements need time to meld.

Just before serving, dust the top of the cake with cocoa.

After notes

How “Punching” was it ?

To make Tiramisu from scratch demanded 2 days plus a day of refrigeration and thus a total of 3 whole days were required. So calculate the time you need to start with time you intend to serve the dessert.

The sponge cake came out perfectly!.soft, spongy, moist, melt in the mouth,which I’d baked on Day-1, around noon. At night, I’d made Mascarpone.

Day-2 was planned for cutting and layering the cake to turn it magically into Tiramisu.

When I was layering the cheese, the room temperature was 40 deg C.Yes, the peak summer day of T.N. I had much difficulty working with it as it was turning to be a watery creamy something.Pushing the whole thing into the freezer once in every 2 minutes helped a little, but then we had a power shut down of full 4 hours at a stretch!.Soon I found myself filling and frosting the cake with my head squeezing into the freezer compartment wide open ;)..

Whew!! it was tiring, absolutely, as the grated chocolate, supposed to be layered over the cheese, was melting fast turning out to be a lump of soft something, again,giving me a shock..

I was forced to use sprinkled chocolate powder as the nearest alternative. Using chocolate chips was a last option, as we don’t like biting into them in soft desserts.

I substituted home made grape wine for the alcohol part.

I am immensely contented with the final outcome, the Perfect Tiramisu a beginner can make!

Pin It!

Sunday, May 30, 2010

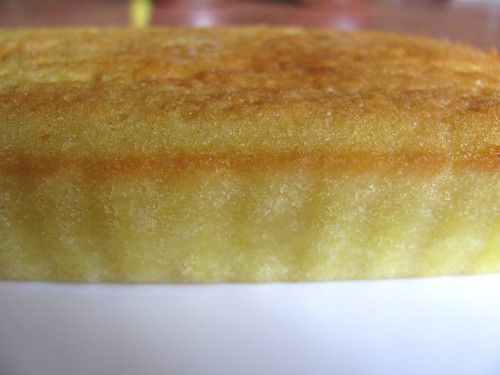
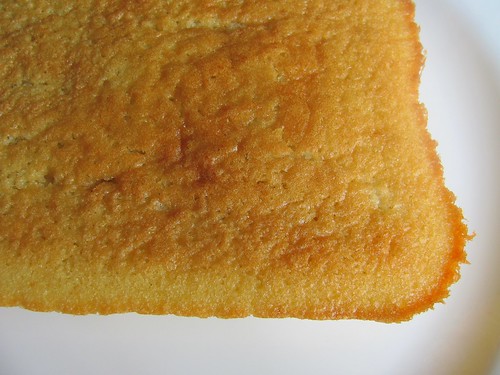
sponge for tiramisu pics


Pin It!

Tuesday, April 27, 2010

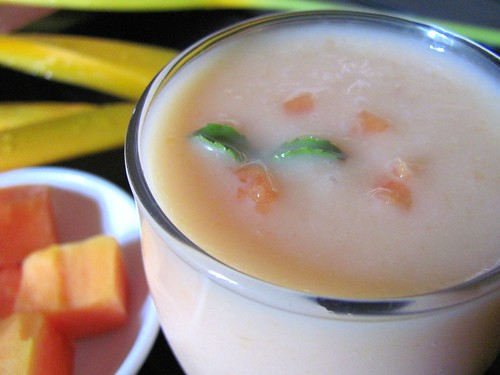
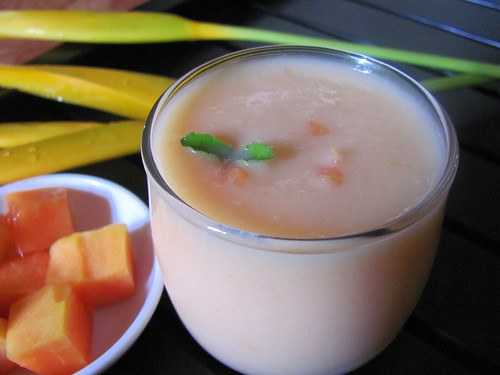
Papaya shake


Pin It!

Monday, April 12, 2010

Badusha-for Raji

Pin It!

Friday, April 9, 2010

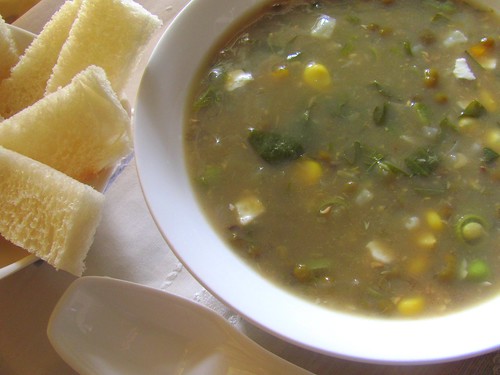
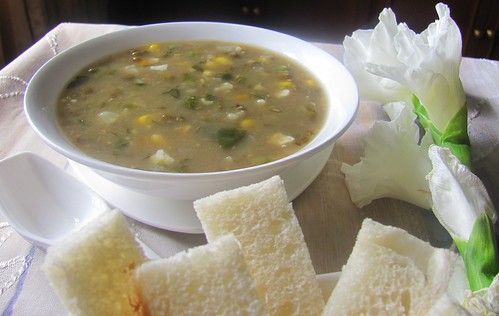
lentil n veg soup pics


Pin It!

Thursday, March 25, 2010

Pizza Pics


Pin It!

Saturday, March 20, 2010

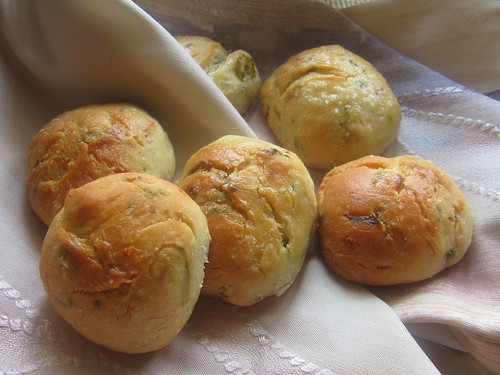
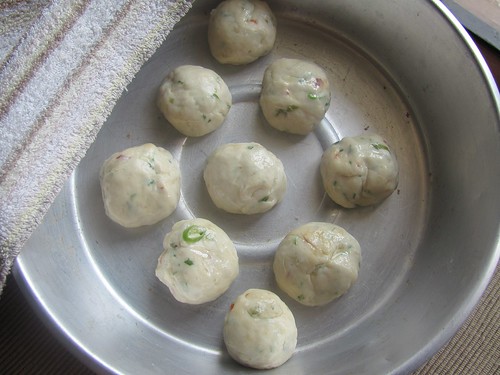
buns pics


Pin It!

Saturday, March 6, 2010

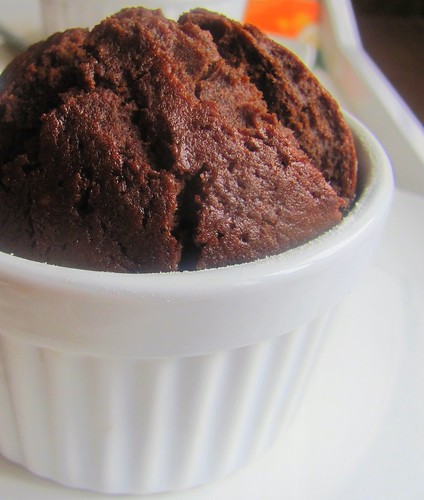
Cocoabanana muffins


Pin It!

Friday, February 12, 2010

Foodbuzz 24, 24, 24: Pongal – The South Indian Harvest Festival, Celebrating Prosperity!

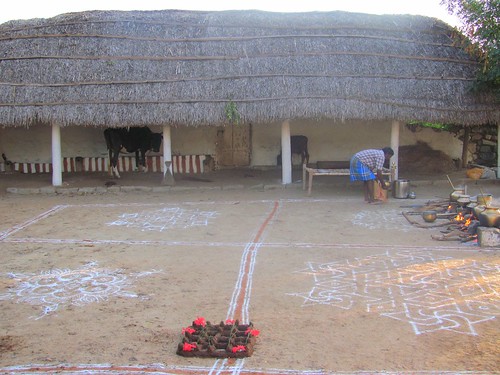
Welcome to our ancestral farm house in the lovely village of Erumaipetti, the beautiful native village of ours, which nestles picturesque farmlands of hard working farmers, located in the prosperous valley of Kolli hills of Tamil Nadu, South India.

I am here in this post to feature about Pongal, the Tamil Festival, which was celebrated traditionally, as always, in this ancestral home of our native village.
If you are interested to know more about the exact geographical location of this rural place, it’s here, here and here.


The rice, sugarcane and pulses, harvested in the Tamil month of 'Thai'(the period of Jan 15th-Feb 15th) as per the Tamil calendar, is cooked traditionally in bronze pots in the backyards of the farmers' houses, as an offering to ‘Sun God’, a way of thanking nature for the bestowal of prosperity.

The food prepared is also named after the festival, Pongal.

The main meal prepared consists of two;
Sarkkarai Pongal; Rice harvested fresh from the farm land, cooked with Pasi parippu(moong dal) and Vellam(jaggery/molasses) for the sweetness, flavoured with cardamom. Any Indian festival is associated with a sweet dish.:)
and
Ven pongal; Rice cooked soft in fresh milk, from one’s own cattle or the dairy farm, with pasi paruppu.

Before we get into the thick of things, I would love to take a quick tour you around the Bungalow :)


The Front yard of our Mighty 300 year old Ancestral Farm house


As you step in...


The Entrance..


The Old fashioned carvings on the teak wood, you see above the door


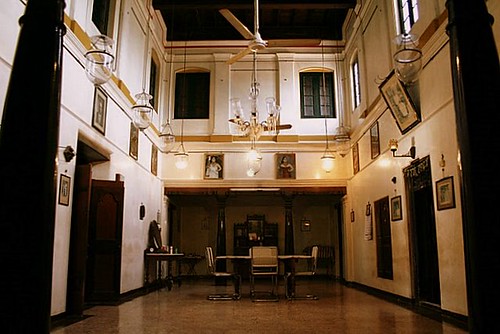
The 'Living' !


The place where the family used to serve food for a larger crowd, in olden days. At the farther end you can see dents on the walls on either sides of the door, where oil lamps were placed for light, when they had no luxury of electricity.The place is obviously not in use at present.


The intricate wood work on pillars.


The 19th century English Chandeliers and Furniture adorn the formal drawing room, created during the British reign in India.


The Kolli Hills and the village as seen from the roof.


So, I am back for now, to the backyard, where the Pongal preparations have already started.Subramani, a great helper of ours, in the farmland associates us for the festival, every year.


A Majority of the cows were shifted to the farm the previous day and the cattle shed holds just Laxmi and her calf...if your eyes are more towards those floral patterns...


..I am here to explain...it's a Kolam.
Know more about the Kolam, here.


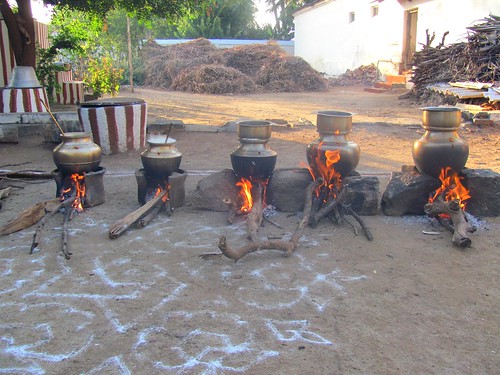
The pots with Ven pongal and Sakkarai Pongal are lined up.
Generally a pot of each is prepared per house.Since we are a big family, we need 5 pots, each year ;)..3 pots of Ven Pongal and 2 of Sweet Pongal..
The firewood used, is again from the farms.


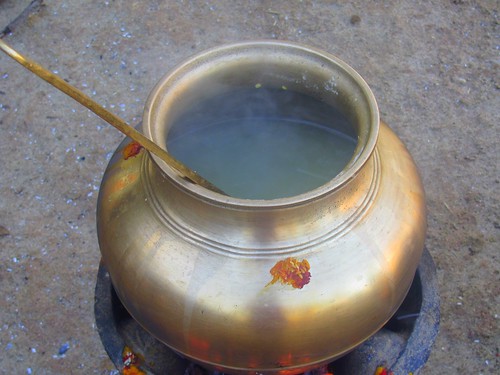
The first pan set, on the stove with Milk, Molasses and the Dal, to boil..


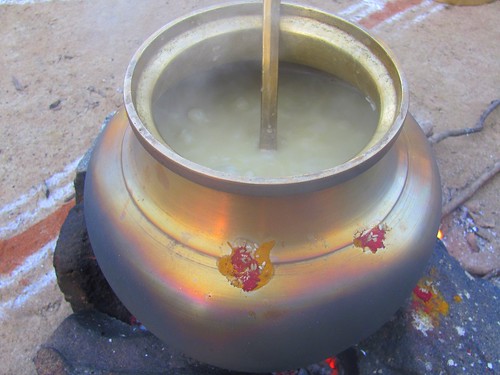
and now after the addition of Rice, the sweet Sakkarai Pongal gets cooked...


The Kanji Thotti.
Guess with what this is made of?
Fresh Cow Dung! :)...and not Mud as it looks like..


..with more firewood for a better flame


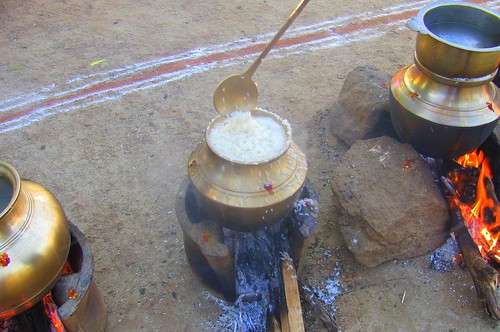
Almost in its final stage.The stove is put off to regulate the heat since the heat of the Bronze pan facilitates the rest of the cooking, imparting that natural flavour to the Pongal..

Here's how to make Sakkarai Pongal, the traditional way-

Sakkarai Pongal

Newly harvested Raw rice - 2 cups
Jaggery- 500gms/2 balls/4 cups after grating
Pasi paruppu/moong dal- roasted lightly- 1/2 cup
Thick milk-3 cups
Fresh coconut gratings- 1/2 cup
A few cashew nuts and raisins fried separately in ghee(clarified butter)
Ghee/Clarified butter-2 tbsps(you can use this to fry the above two)
Cardamom powder- to flavour

Fill 3/4th level of the bronze pot with water with a little milk added to it. Place the pot on stove.When the water boils, stir in the moong dal.The water boils over due to the milk and dal in the pot and when it reaches the brink, and bubbles over, the family gathers round to shout 'Pongalo Pongal!', the loud cheer marking the festivity of 'Celebrating the Prosperity'!

Now, the water level has to be brought down to half the level, by transferring half of it to another vessel.When the dal in the pot is half cooked, add the washed raw rice.Keep stirring to facilitate even cooking.When cooked soft, add the grated/powdered jaggery, stirring all the while. Add a pinch of sea salt.Check the consistency at this stage and add milk little by little as it tends to boil over, again stirring continously.Add the transferred hot water if necessary.Stir in grated coconut, ghee( in which the cashews and raisins were fried) and cardamom powder when the Pongal in the pot is blended and cooked soft and mushy.Remove from fire and garnish with fried cashew nuts and raisins. Place for Pooja.
'Taste testing' the food is not done as the pot has to be placed for Pooja, an offering to God.


Now it's the turn for Pal Pongal, being mashed up with a heavy bronze ladle all the while getting cooked.


This is when we shout Pongalo Pongal! (meaning, may we welcome the prosperity!)right at that moment when the milk in the pot boils over! :)


While the kids are having their time in the front yard..


Subramani is busy with his work...


..a much conscious cook as he speeds up his work calculating the time with the golden rays of the setting sun..


Tulsi (basil leaves) and Poolai poo goes in the squares and stalks of grass inserted on the walls.The milk has to wait, till the Pooja starts.


The Sun is further down..


and Veeran..


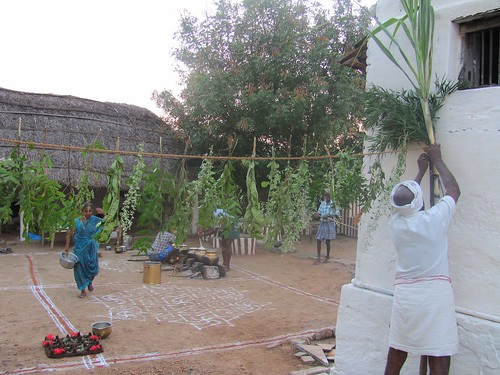
sets up the Thoranam with a bunch of bamboo leaves on one end, to start with..


..and yeah..let me introduce Rajathi to you guys; the retired farmer maid, who was eager to see the family gathering.She's a typical old village woman in her brand new colourful Pongal Saree..:)


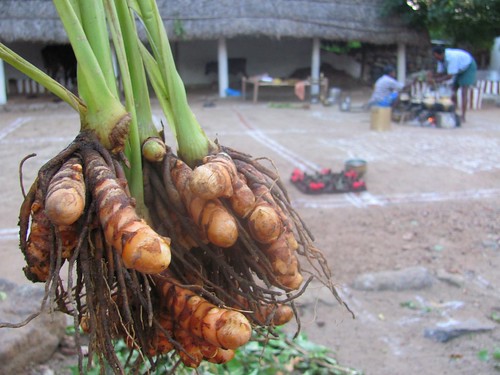
...back to Veeran who prepares the Decorative Line or the Thoranam.What you see here is fresh turmeric, again, pulled out from the farm, a 'must to be used ingredient' for the Thoranam, hung out on either ends.


Mango and Neem leaves are alternated with Poolai poo to set the thoranam with harvested Sugar Canes on either sides making the Line complete...
...hearing the loud sound of the beating drums, I couldn't help rushing to the front yard..:)...


..to confront the men representing the temple informing the house to get their cows ready..


and Laxmi hears them right!!..:)


Natesan and Veeran are already off to get her ready..


while Subramani is assisted by Veeramalai to attend to the pots.


and the hot hot Pal Pongal is finally ready

Here's Traditional Recipe for Pal Pongal..

Newly harvested Raw Rice-1 cup
Fresh Milk- 6 cups
Water-1 cup
Moong dal- a tsp
Salt-to taste

Wash rice, drain and keep aside. Mix milk and water together in a vessel, which would yield 7 cups. Transfer half the quantity to the bronze pot and bring to a boil. Add rice and and stir well.Minimise the flame to medium as the milk boils over the pot.To bring down the flame, a piece or two of wood is pulled out if cooked in a firewood stove as you see here.When the rice gets cooked and absorbs the liquid content, pour the remaining milk little by little, stirring all the while. A heavy bottomed utensil like a bronze pot is a must as the Pongal tends to stick to the base at this stage.Keep stirring with a bronze ladle until the rice is cooked and turns creamy and soft. Remove from fire. Place for Pooja.Pongal tends to attain a harder consistency while cooled down.


The men are seen still busy chatting while the women of the family get ready for the Pooja(prayer)...Oops... I'm in!.. I'm in!...:)


The Lady of the house, my mom in law, lights the lamp to announce the start of the Pooja.


so as to invite the families to assemble.


Subramani transfers a little of the Pongals for Neivedyam(offering to God) from the lined up Pots ready for the Pooja.


The fully decorated Thotti.
Pal Pongal
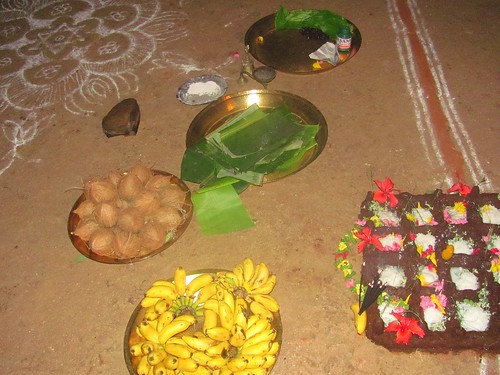
and Milk are in the pits, finished off with Kadambam(a variety of colourful flowers on a string used for Pooja).


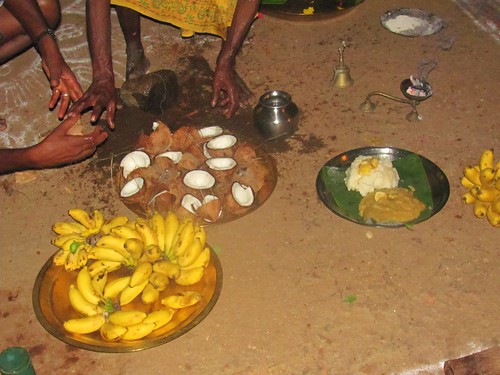
Coconuts and bananas play an important role in every Pooja..


Coconuts are broken to halves and the water collected in a sombhu for Theertham, set aside the Pongal Pallayam; the two small heaps of both the Pongals with dents in the middle filled with fresh ghee, bits of jaggery and banana.


Next he takes out the samples from the rest of the pots ..


and the Pooja is performed.


The person who performs the Pooja is called a Pandaram or the Village Priest.


The neivedyam is offered to the cows after the Pooja, as they are considered sacred.


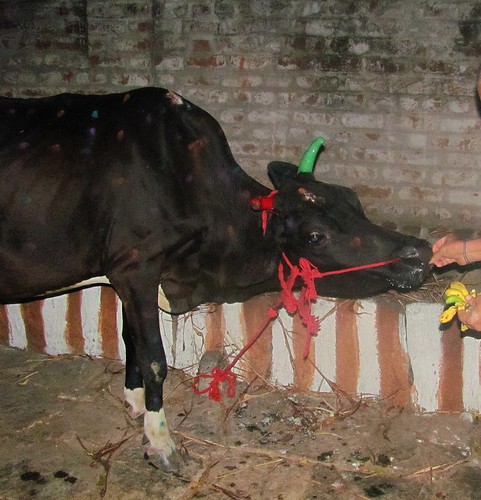
Laxmi with her painted horns and coloured skin awaits eagerly, while


Pandaram followed by the farmers, heads towards the cattle shed...


to feed Laxmi, the Pongal Pallayam, which has already been offered to God.
As soon she licks it off, clean..


..my dad in law, the master of the house, offers her favourite food; Bananas :)


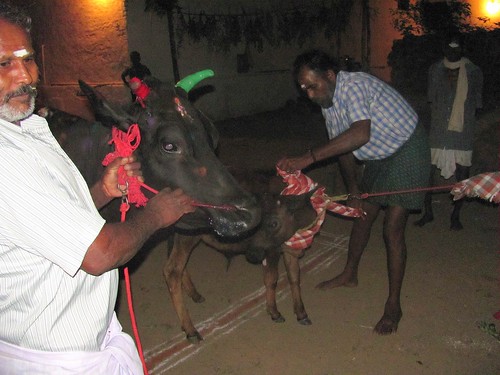
Her calf is taken care of, next...:)


Towels are wrapped around the necks of the cow n calf.


and are made to stamp past the decorated Thotti to be led to the temple by the farmers.


The cows get back from the temple..


and the food is served to the men first on fresh green plantain leaves!


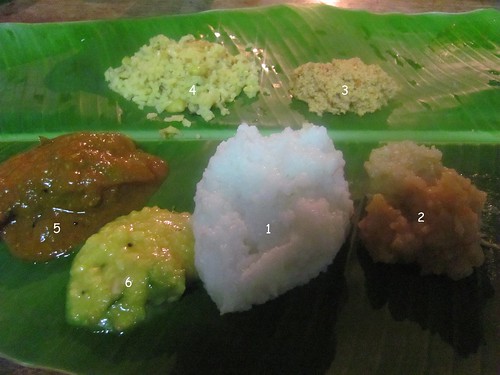
The food on the leaf.(The chandelier was kept 'dim' and hence the poor lighting here)

1.Pal Pongal

2.Sakkarai Pongal

and the accompaniments,

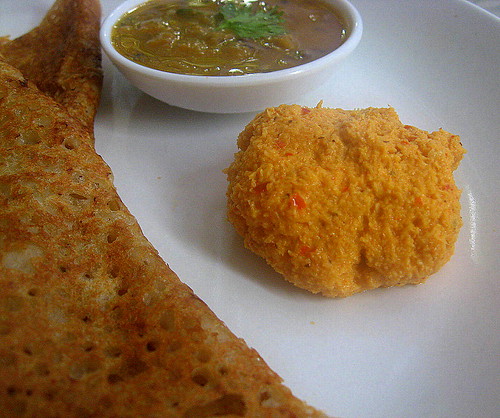
3.Thengai Thuvaiyal

4.Mochai sadam(nothing to do with Pongal and was served as one my aunts made that for us).Find the recipe here.

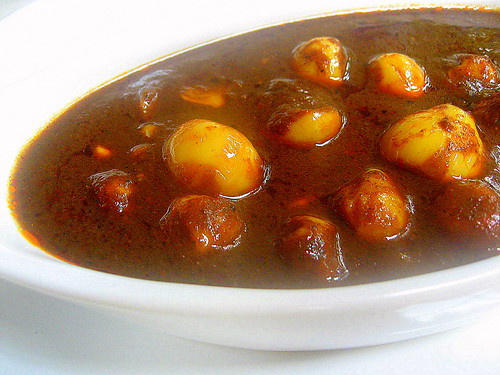
5.Ennai Kathrikkai Kuzhambu/Tangy Eggplant Curry

6.Pasiparuppu/Tempered dal

The recipes of the other accompaniments will be posted soon.


The Dessert Section ;) ..Sorry for the intentionally blurred pic, folks :)

The eldest member, Aunt Indira holding the youngest , the 6 month old Ashwath :)!
If I had not mentioned earlier, it was a get together of 4 generations of the family.

A Few Afternotes from the Blogger

I just can't explain in words how glad I am for being selected as one among the 24 participants for the month's event!
I feel extremely proud to have show cased the festival of our country to the world and I have absolutely no words to Thank the Great Food Buzz Team which made this possible!
The Ancestral Bungalow which has witnessed over 300 Pongal celebrations has seen the last this year as my parents-in-law are moving to a compact house in the nearby town.
On another note, Laxmi, the cow is dead, the very next day after Pongal due to snake bite.
She was trying to chew out hay from the hay stack when was bitten by the snake on her tongue.


Thank You for going through the long long post probably the longest, posted in mine, so far!
Hope you enjoyed the same!

Lots of Love,
Bharathy :)

Foodbuzz 24, 24, 24: Pongal – The South Indian Harvest Festival, Celebrating Prosperity!
Pin It!